m (SapadorCastelo moved page Starting, Surviving, & Winning to Starting, surviving, & winning: Thread:5186) |
No edit summary |
||
| Line 1: | Line 1: | ||
| + | {{NeedsAttention| |
||
| − | :''This is a guide to the whole of'' {{Kingdom Classic}}. |
||
| − | + | This is a guide to the whole of ''[[Kingdom: Classic]]''.<br> |
|
| + | It requires more updates to help users in ''[[Kingdom: New Lands|New Lands]]'' and ''[[Kingdom: Two Crowns|Two Crowns]]''.}} |
||
| − | :''Please contribute as much as you like and amend what is needed based on your experiences.'' |
||
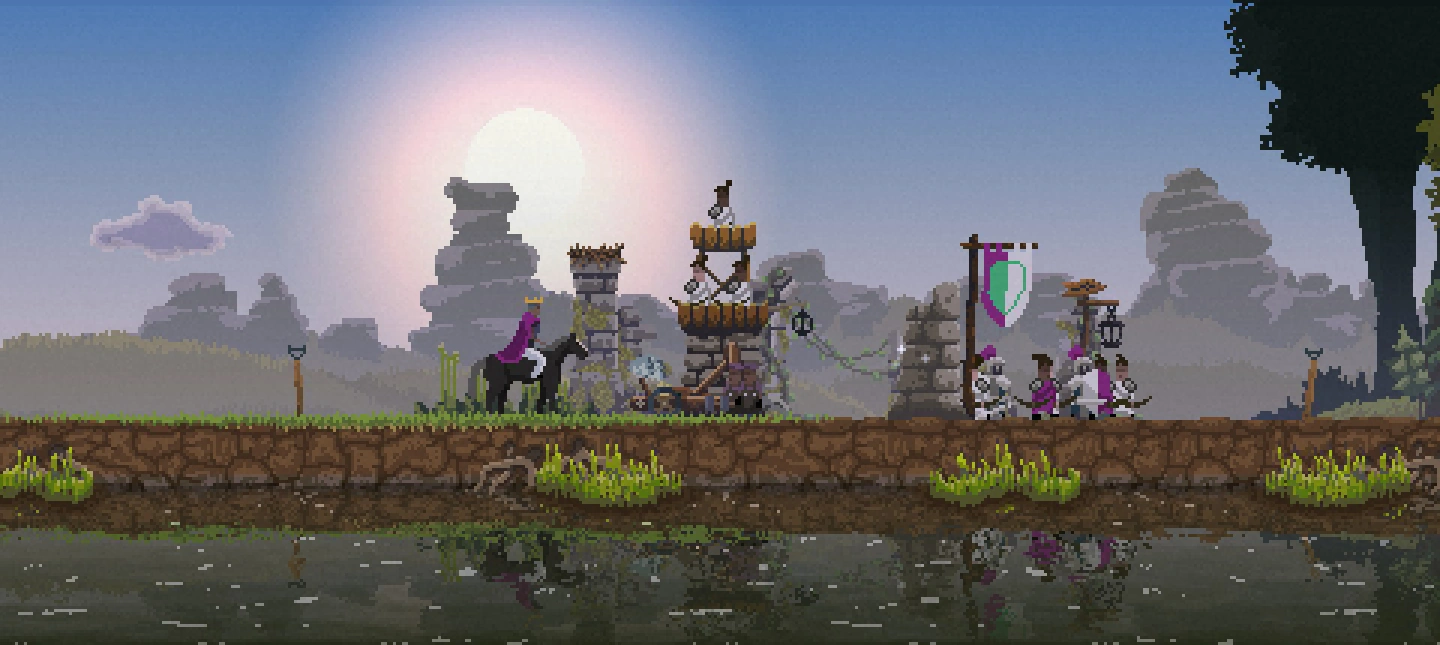
| + | [[File:Outer wall fort tower.png|thumb|440px|A fort constructed "from" the ruins of an old castle]] |
||
| ⚫ | |||
| + | {{Page|strategy}} |
||
| + | |||
| ⚫ | |||
When you begin in Kingdom, the first priority should be getting two inner walls and two archers. These simple defenses should be able to hold off attackers for a few nights; enough time to get more workers. The next priority, as aforementioned, should be to get as many workers as possible. Throughout the whole game the player should be gathering workers, as there is no cap to how many archers one can have, and any attack can be repelled with enough archers. |
When you begin in Kingdom, the first priority should be getting two inner walls and two archers. These simple defenses should be able to hold off attackers for a few nights; enough time to get more workers. The next priority, as aforementioned, should be to get as many workers as possible. Throughout the whole game the player should be gathering workers, as there is no cap to how many archers one can have, and any attack can be repelled with enough archers. |
||
For the first ten or so nights, level two walls on either side and about three archers defending each side should be enough to keep going, and at this point your priority should be getting farms, and farmers to work them. You'll want to make sure that any farms you build have a wall between them & the enemy as soon as possible, so that you can safely upgrade the farm in order to increase potential output. Farmers are very expensive, and can be crippling to lose, if you're low on money, so make sure to beef up your defenses. Early expansion is key to survival, and one farm as soon as possible, fully staffed, can easily handle the costs for upgrades prior to stone. While waiting for money generation from farms, you should keep getting more workers. You'll want to make enough builders that two or three are idle in town, and once your farm/s are fully staffed, more bowmen can never hurt, especially because they are very cheap. |
For the first ten or so nights, level two walls on either side and about three archers defending each side should be enough to keep going, and at this point your priority should be getting farms, and farmers to work them. You'll want to make sure that any farms you build have a wall between them & the enemy as soon as possible, so that you can safely upgrade the farm in order to increase potential output. Farmers are very expensive, and can be crippling to lose, if you're low on money, so make sure to beef up your defenses. Early expansion is key to survival, and one farm as soon as possible, fully staffed, can easily handle the costs for upgrades prior to stone. While waiting for money generation from farms, you should keep getting more workers. You'll want to make enough builders that two or three are idle in town, and once your farm/s are fully staffed, more bowmen can never hurt, especially because they are very cheap. |
||
| − | === |
+ | ===Small tips=== |
* Hunting for [[Wildlife|rabbits]] is a good secondary source of income, especially since the archers who are not in towers or with knights will spend their daytime roaming near the outer walls and hunting. Large and open grassy fields are required in order to get rabbit bushes. Cutting trees and leaving open spaces will allow for the grass to slowly spread, creating spaces wide enough for tall grass and bushes to form. Reasonable grassy stretches past the kingdom border generates a lot of income from archers. [[Grazing|Grass]] only spreads from existing grass and won't spread past walls or most buildings unless they are in a building state. If you have accidentally walled of a grass field, you can upgrade it and immediately send your builders else where as soon as possible (ex: clearing trees, upgrading something else). Since builders will prioritize the last order issued, enough time can be bought to let the grass grow past the structure. |
* Hunting for [[Wildlife|rabbits]] is a good secondary source of income, especially since the archers who are not in towers or with knights will spend their daytime roaming near the outer walls and hunting. Large and open grassy fields are required in order to get rabbit bushes. Cutting trees and leaving open spaces will allow for the grass to slowly spread, creating spaces wide enough for tall grass and bushes to form. Reasonable grassy stretches past the kingdom border generates a lot of income from archers. [[Grazing|Grass]] only spreads from existing grass and won't spread past walls or most buildings unless they are in a building state. If you have accidentally walled of a grass field, you can upgrade it and immediately send your builders else where as soon as possible (ex: clearing trees, upgrading something else). Since builders will prioritize the last order issued, enough time can be bought to let the grass grow past the structure. |
||
| − | |||
* Hold off on upgrading the base too far until you need to, or are confident in your ability to make money, as when you upgrade the camp your taxes from the daily chest will lessen, ultimately to one a day |
* Hold off on upgrading the base too far until you need to, or are confident in your ability to make money, as when you upgrade the camp your taxes from the daily chest will lessen, ultimately to one a day |
||
* It may be a good idea to avoid expanding into any recruitment camps until you need to, as at all stages in the game it's good to maximize workers. Destroying all of the trees between your base and the campsite will get rid of it. If you find an open area past the camps that allows a wall construction, you can extend the kingdom past the camps and chop down all trees except the two immediately flanking the camp. |
* It may be a good idea to avoid expanding into any recruitment camps until you need to, as at all stages in the game it's good to maximize workers. Destroying all of the trees between your base and the campsite will get rid of it. If you find an open area past the camps that allows a wall construction, you can extend the kingdom past the camps and chop down all trees except the two immediately flanking the camp. |
||
| Line 16: | Line 18: | ||
* Remember that if you completely run your horse dry of stamina, it'll take longer before you can run again. It's a good idea to stop running & walk as soon as the horse starts puffing, to maximize speed. If you stop the horse in a grassy open area, the horse will eat some grass and fully recover within a second or two. |
* Remember that if you completely run your horse dry of stamina, it'll take longer before you can run again. It's a good idea to stop running & walk as soon as the horse starts puffing, to maximize speed. If you stop the horse in a grassy open area, the horse will eat some grass and fully recover within a second or two. |
||
| − | == |
+ | ==Surviving to the late game== |
Acquiring a second farm is a good idea, just as soon as you've expanded out to it. Around this time as well, finding & upgrading the wooden shrine to a stone one is recommended. At the point where you have two farms, level three walls are needed to keep them alive. It is also nice to have your border walls situated near archer towers, though it is not entirely necessary. This is also a good time to get the base camp to level four and invest in some catapults. Once you have successfully acquired two farms, you should be easily able to sustain most upgrades, even to the point where you may start to overfill your bag daily, if the farms each can and are supporting six farmers. Around now, you should easily be able to continually keep the builder/archer shrines fully buffed at all times. If you are not at that point, it is reasonable to get a third farm. Three farms should be enough to keep your pouch filled the whole game, unless you decide to expand extremely rapidly. Once you are sure of your income, do upgrade your town all the way and assault a portal. It is good to start taking down portals early on, as the amount of enemies spawned once a portal is broken will increase daily (verification needed), and as the game goes on, blood moons will become harder & harder to get through, even with constant bowman recruitment, so finishing the game ASAP is the only way to survive. |
Acquiring a second farm is a good idea, just as soon as you've expanded out to it. Around this time as well, finding & upgrading the wooden shrine to a stone one is recommended. At the point where you have two farms, level three walls are needed to keep them alive. It is also nice to have your border walls situated near archer towers, though it is not entirely necessary. This is also a good time to get the base camp to level four and invest in some catapults. Once you have successfully acquired two farms, you should be easily able to sustain most upgrades, even to the point where you may start to overfill your bag daily, if the farms each can and are supporting six farmers. Around now, you should easily be able to continually keep the builder/archer shrines fully buffed at all times. If you are not at that point, it is reasonable to get a third farm. Three farms should be enough to keep your pouch filled the whole game, unless you decide to expand extremely rapidly. Once you are sure of your income, do upgrade your town all the way and assault a portal. It is good to start taking down portals early on, as the amount of enemies spawned once a portal is broken will increase daily (verification needed), and as the game goes on, blood moons will become harder & harder to get through, even with constant bowman recruitment, so finishing the game ASAP is the only way to survive. |
||
Always make sure your catapults are up and running, as soon as you get them. If you are not near them, you can easily check the status of both while at the base camp by simply going up to the catapult construction building & seeing if the option is there to rebuild them. Catapults are quintessential to surviving the mid-late game, as they can easily deal with any size of Greed horde as long as their wall remains alive. Now, at this stage in the game, you'll want a barrier of a few walls between your farms and the portals, as well as most of the towers you can get. Do avoid getting towers far away from walls, though, since archer towers are practically useless when enemies can just walk by them. At this point, two or three of the demon portals should have been destroyed, though before you assault the third or fourth one, it's necessary to have level four walls. |
Always make sure your catapults are up and running, as soon as you get them. If you are not near them, you can easily check the status of both while at the base camp by simply going up to the catapult construction building & seeing if the option is there to rebuild them. Catapults are quintessential to surviving the mid-late game, as they can easily deal with any size of Greed horde as long as their wall remains alive. Now, at this stage in the game, you'll want a barrier of a few walls between your farms and the portals, as well as most of the towers you can get. Do avoid getting towers far away from walls, though, since archer towers are practically useless when enemies can just walk by them. At this point, two or three of the demon portals should have been destroyed, though before you assault the third or fourth one, it's necessary to have level four walls. |
||
| − | === |
+ | ===Small tips=== |
* Any archers on the ground with the same color clothing as the knights will assault the demon portal with the knights, once you choose to go out & fight. Four to six should be able to easily destroy the portal. Keep in mind that it is entirely possible that none of the knights or archers attacking the portal will make it back to the safety of the walls, so make sure you have ample backup in the towers and on the ground to defend. |
* Any archers on the ground with the same color clothing as the knights will assault the demon portal with the knights, once you choose to go out & fight. Four to six should be able to easily destroy the portal. Keep in mind that it is entirely possible that none of the knights or archers attacking the portal will make it back to the safety of the walls, so make sure you have ample backup in the towers and on the ground to defend. |
||
* If you lose all of your farms, it is very unlikely you will be able to keep going. Even if you have a good amount of money, getting all of the workers you've lost back is not only very time-consuming, but so is rebuilding walls and getting more tools, after which you'll have to wait for a few harvests in order to fully recover. Therefore, it is advisable to have at least one farm on each side, in case a side fails to hold its own. |
* If you lose all of your farms, it is very unlikely you will be able to keep going. Even if you have a good amount of money, getting all of the workers you've lost back is not only very time-consuming, but so is rebuilding walls and getting more tools, after which you'll have to wait for a few harvests in order to fully recover. Therefore, it is advisable to have at least one farm on each side, in case a side fails to hold its own. |
||
| Line 27: | Line 29: | ||
* Around day thirty, having both shrines constantly active is necessary to keep your chances of survival high. |
* Around day thirty, having both shrines constantly active is necessary to keep your chances of survival high. |
||
| − | == |
+ | ==The finale== |
Now, the final portal will be very difficult. And it will likely get more difficult the longer you wait. (again, verification needed). So the buildup to this point will be constant running around, collecting money, upgrading, and keeping shrines active. When you destroy both portals on one side, you will temporarily no longer have to worry about defending that side up until the end, but once you've activated the end, both sides will get attacked. If you haven't already gotten three farms, you need to have them. Technically, you can just beef up one side and hope the middle of the beefiness survives, but given the AIs of your workers, you'll be better off making sure both sides can defend themselves. Make sure ALL of your border defenses are upgraded, and make sure to go out and recruit more bowmen every day. It's advisable as well to have a nice excess of builders; four to six being idle when not upgrading is a decent amount, since you should be constantly upgrading any defensive buildings at this point, at any & all positions in your castle. |
Now, the final portal will be very difficult. And it will likely get more difficult the longer you wait. (again, verification needed). So the buildup to this point will be constant running around, collecting money, upgrading, and keeping shrines active. When you destroy both portals on one side, you will temporarily no longer have to worry about defending that side up until the end, but once you've activated the end, both sides will get attacked. If you haven't already gotten three farms, you need to have them. Technically, you can just beef up one side and hope the middle of the beefiness survives, but given the AIs of your workers, you'll be better off making sure both sides can defend themselves. Make sure ALL of your border defenses are upgraded, and make sure to go out and recruit more bowmen every day. It's advisable as well to have a nice excess of builders; four to six being idle when not upgrading is a decent amount, since you should be constantly upgrading any defensive buildings at this point, at any & all positions in your castle. |
||
| − | Since the game immediately ends after you've defeated this final wave, your workers losing their coins no longer matters, just as long as you have enough to diminish the hordes of monsters and ultimately kill them at the center. Getting the archer towers and walls at the center fully upgraded is a MUST, just in case, as are the borders. Hopefully, the monsters won't reach the center, but just in case they do, it's good to have backup. Defeating the final portal around day |
+ | Since the game immediately ends after you've defeated this final wave, your workers losing their coins no longer matters, just as long as you have enough to diminish the hordes of monsters and ultimately kill them at the center. Getting the archer towers and walls at the center fully upgraded is a MUST, just in case, as are the borders. Hopefully, the monsters won't reach the center, but just in case they do, it's good to have backup. Defeating the final portal around day fifty is the likeliest maximum amount of time in which you'll still be able to do it; past that, you'll probably get killed by a blood moon. It may also reduce the amount of monsters you'll get out of the finale at once if you destroy the final portal right after a blood moon (verification needed), though if you do that, you should make sure your borders are okay & repaired before you attack. |
The most efficient way of preparing for the final wave will be to go out every day, upgrade defenses as you travel out, collect money as needed, and run out to recruit. Creating portals when you can will help with the speediness of recruitment. Always remember, as well, that if you upgrade archer towers past level two, archers will be taken off of ground border defense duty to go into them, so make sure you have a few surplus archers on the ground before you do too much tower upgrading, lest you get crippled even before the attack starts. As soon as you have four+ layers of fully upgraded walls (on each side), and most of your archer towers fully upgraded & staffed, as well as ten+ spare archers on the ground on each side, you're probably ready to take on the final portal. Again, remember that the archers who go out in this fight very well may not make it back, so make sure that you have some spares waiting by the wall who won't go out with the knights. |
The most efficient way of preparing for the final wave will be to go out every day, upgrade defenses as you travel out, collect money as needed, and run out to recruit. Creating portals when you can will help with the speediness of recruitment. Always remember, as well, that if you upgrade archer towers past level two, archers will be taken off of ground border defense duty to go into them, so make sure you have a few surplus archers on the ground before you do too much tower upgrading, lest you get crippled even before the attack starts. As soon as you have four+ layers of fully upgraded walls (on each side), and most of your archer towers fully upgraded & staffed, as well as ten+ spare archers on the ground on each side, you're probably ready to take on the final portal. Again, remember that the archers who go out in this fight very well may not make it back, so make sure that you have some spares waiting by the wall who won't go out with the knights. |
||
Throughout the duration of the fight, you should make sure to keep your catapults up & running, so get some gold from your farms if you haven't already, and return home. There's not a whole lot you can do at the borders to bolster your fighters' efforts other than drop coins to take off some of the horde, so just wait to rebuild your catapults in what should be the safest place on the map, if you've prepared properly: your home. You should also make sure to keep a full rack of bows, just in case any tool-less workers can run away to the base in time. Then all you can do is wait to see the outcome. |
Throughout the duration of the fight, you should make sure to keep your catapults up & running, so get some gold from your farms if you haven't already, and return home. There's not a whole lot you can do at the borders to bolster your fighters' efforts other than drop coins to take off some of the horde, so just wait to rebuild your catapults in what should be the safest place on the map, if you've prepared properly: your home. You should also make sure to keep a full rack of bows, just in case any tool-less workers can run away to the base in time. Then all you can do is wait to see the outcome. |
||
| − | [[File: |
+ | [[File:Cliff portals can be destroyed (New Lands)|thumb|330px|Tested by [[User:Frube1994|Frube1994]]]] |
In {{Kingdom New Lands}}, the game does not end upon defeating all of the available portals. It is possible to destroy the portal that is embedded in the wall based on either side of the map, but as aforementioned, this will not end the game. To "win" in New Lands, you must build the boat and leave to the next land. If you defeat all portals (including the embedded wall portal), you will have several days of complete peace, but at the end, the wall portal is rebuilt and will resume attacking. |
In {{Kingdom New Lands}}, the game does not end upon defeating all of the available portals. It is possible to destroy the portal that is embedded in the wall based on either side of the map, but as aforementioned, this will not end the game. To "win" in New Lands, you must build the boat and leave to the next land. If you defeat all portals (including the embedded wall portal), you will have several days of complete peace, but at the end, the wall portal is rebuilt and will resume attacking. |
||
| − | |||
| − | {{MasterNavbox2}} |
||
| − | [[Category:Strategy]] |
||
Revision as of 22:01, 17 February 2020

|
This article is in need of attention
|
A fort constructed "from" the ruins of an old castle
Starting out
When you begin in Kingdom, the first priority should be getting two inner walls and two archers. These simple defenses should be able to hold off attackers for a few nights; enough time to get more workers. The next priority, as aforementioned, should be to get as many workers as possible. Throughout the whole game the player should be gathering workers, as there is no cap to how many archers one can have, and any attack can be repelled with enough archers.
For the first ten or so nights, level two walls on either side and about three archers defending each side should be enough to keep going, and at this point your priority should be getting farms, and farmers to work them. You'll want to make sure that any farms you build have a wall between them & the enemy as soon as possible, so that you can safely upgrade the farm in order to increase potential output. Farmers are very expensive, and can be crippling to lose, if you're low on money, so make sure to beef up your defenses. Early expansion is key to survival, and one farm as soon as possible, fully staffed, can easily handle the costs for upgrades prior to stone. While waiting for money generation from farms, you should keep getting more workers. You'll want to make enough builders that two or three are idle in town, and once your farm/s are fully staffed, more bowmen can never hurt, especially because they are very cheap.
Small tips
- Hunting for rabbits is a good secondary source of income, especially since the archers who are not in towers or with knights will spend their daytime roaming near the outer walls and hunting. Large and open grassy fields are required in order to get rabbit bushes. Cutting trees and leaving open spaces will allow for the grass to slowly spread, creating spaces wide enough for tall grass and bushes to form. Reasonable grassy stretches past the kingdom border generates a lot of income from archers. Grass only spreads from existing grass and won't spread past walls or most buildings unless they are in a building state. If you have accidentally walled of a grass field, you can upgrade it and immediately send your builders else where as soon as possible (ex: clearing trees, upgrading something else). Since builders will prioritize the last order issued, enough time can be bought to let the grass grow past the structure.
- Hold off on upgrading the base too far until you need to, or are confident in your ability to make money, as when you upgrade the camp your taxes from the daily chest will lessen, ultimately to one a day
- It may be a good idea to avoid expanding into any recruitment camps until you need to, as at all stages in the game it's good to maximize workers. Destroying all of the trees between your base and the campsite will get rid of it. If you find an open area past the camps that allows a wall construction, you can extend the kingdom past the camps and chop down all trees except the two immediately flanking the camp.
- Keep in mind that you won't die as long as you have money in your pouch, and that if entirely necessary, you can drop money on the ground to keep enemies from reaching important buildings or workers, like farmers or catapults, since the greedlings will run away once they have a coin in their hands, and a coin is cheaper than a tool. Similarly, you can scout and find the chest of coins in the woods the first few nights and only expect to use a coin or two fending off greedlings.
- The caravan merchant is very good for getting tools in the early game, as he'll be more cost-effective than directly purchasing tools, however you ought to only really use him if you're fine with getting any of the tools, since he'll fill up one random tool stand.
- Remember that if you completely run your horse dry of stamina, it'll take longer before you can run again. It's a good idea to stop running & walk as soon as the horse starts puffing, to maximize speed. If you stop the horse in a grassy open area, the horse will eat some grass and fully recover within a second or two.
Surviving to the late game
Acquiring a second farm is a good idea, just as soon as you've expanded out to it. Around this time as well, finding & upgrading the wooden shrine to a stone one is recommended. At the point where you have two farms, level three walls are needed to keep them alive. It is also nice to have your border walls situated near archer towers, though it is not entirely necessary. This is also a good time to get the base camp to level four and invest in some catapults. Once you have successfully acquired two farms, you should be easily able to sustain most upgrades, even to the point where you may start to overfill your bag daily, if the farms each can and are supporting six farmers. Around now, you should easily be able to continually keep the builder/archer shrines fully buffed at all times. If you are not at that point, it is reasonable to get a third farm. Three farms should be enough to keep your pouch filled the whole game, unless you decide to expand extremely rapidly. Once you are sure of your income, do upgrade your town all the way and assault a portal. It is good to start taking down portals early on, as the amount of enemies spawned once a portal is broken will increase daily (verification needed), and as the game goes on, blood moons will become harder & harder to get through, even with constant bowman recruitment, so finishing the game ASAP is the only way to survive.
Always make sure your catapults are up and running, as soon as you get them. If you are not near them, you can easily check the status of both while at the base camp by simply going up to the catapult construction building & seeing if the option is there to rebuild them. Catapults are quintessential to surviving the mid-late game, as they can easily deal with any size of Greed horde as long as their wall remains alive. Now, at this stage in the game, you'll want a barrier of a few walls between your farms and the portals, as well as most of the towers you can get. Do avoid getting towers far away from walls, though, since archer towers are practically useless when enemies can just walk by them. At this point, two or three of the demon portals should have been destroyed, though before you assault the third or fourth one, it's necessary to have level four walls.
Small tips
- Any archers on the ground with the same color clothing as the knights will assault the demon portal with the knights, once you choose to go out & fight. Four to six should be able to easily destroy the portal. Keep in mind that it is entirely possible that none of the knights or archers attacking the portal will make it back to the safety of the walls, so make sure you have ample backup in the towers and on the ground to defend.
- If you lose all of your farms, it is very unlikely you will be able to keep going. Even if you have a good amount of money, getting all of the workers you've lost back is not only very time-consuming, but so is rebuilding walls and getting more tools, after which you'll have to wait for a few harvests in order to fully recover. Therefore, it is advisable to have at least one farm on each side, in case a side fails to hold its own.
- If a portal is especially far away from your border, and therefore your knights, you ought to wait until dawn to attack, because your attack force might run into a nightly raid midway to the portal otherwise.
- Around day thirty, having both shrines constantly active is necessary to keep your chances of survival high.
The finale
Now, the final portal will be very difficult. And it will likely get more difficult the longer you wait. (again, verification needed). So the buildup to this point will be constant running around, collecting money, upgrading, and keeping shrines active. When you destroy both portals on one side, you will temporarily no longer have to worry about defending that side up until the end, but once you've activated the end, both sides will get attacked. If you haven't already gotten three farms, you need to have them. Technically, you can just beef up one side and hope the middle of the beefiness survives, but given the AIs of your workers, you'll be better off making sure both sides can defend themselves. Make sure ALL of your border defenses are upgraded, and make sure to go out and recruit more bowmen every day. It's advisable as well to have a nice excess of builders; four to six being idle when not upgrading is a decent amount, since you should be constantly upgrading any defensive buildings at this point, at any & all positions in your castle.
Since the game immediately ends after you've defeated this final wave, your workers losing their coins no longer matters, just as long as you have enough to diminish the hordes of monsters and ultimately kill them at the center. Getting the archer towers and walls at the center fully upgraded is a MUST, just in case, as are the borders. Hopefully, the monsters won't reach the center, but just in case they do, it's good to have backup. Defeating the final portal around day fifty is the likeliest maximum amount of time in which you'll still be able to do it; past that, you'll probably get killed by a blood moon. It may also reduce the amount of monsters you'll get out of the finale at once if you destroy the final portal right after a blood moon (verification needed), though if you do that, you should make sure your borders are okay & repaired before you attack.
The most efficient way of preparing for the final wave will be to go out every day, upgrade defenses as you travel out, collect money as needed, and run out to recruit. Creating portals when you can will help with the speediness of recruitment. Always remember, as well, that if you upgrade archer towers past level two, archers will be taken off of ground border defense duty to go into them, so make sure you have a few surplus archers on the ground before you do too much tower upgrading, lest you get crippled even before the attack starts. As soon as you have four+ layers of fully upgraded walls (on each side), and most of your archer towers fully upgraded & staffed, as well as ten+ spare archers on the ground on each side, you're probably ready to take on the final portal. Again, remember that the archers who go out in this fight very well may not make it back, so make sure that you have some spares waiting by the wall who won't go out with the knights.
Throughout the duration of the fight, you should make sure to keep your catapults up & running, so get some gold from your farms if you haven't already, and return home. There's not a whole lot you can do at the borders to bolster your fighters' efforts other than drop coins to take off some of the horde, so just wait to rebuild your catapults in what should be the safest place on the map, if you've prepared properly: your home. You should also make sure to keep a full rack of bows, just in case any tool-less workers can run away to the base in time. Then all you can do is wait to see the outcome.
Tested by Frube1994
In Template:Kingdom New Lands, the game does not end upon defeating all of the available portals. It is possible to destroy the portal that is embedded in the wall based on either side of the map, but as aforementioned, this will not end the game. To "win" in New Lands, you must build the boat and leave to the next land. If you defeat all portals (including the embedded wall portal), you will have several days of complete peace, but at the end, the wall portal is rebuilt and will resume attacking.